
Children need control of the large muscles in their legs, arms and torso for all kinds of activities. These seven imaginative games absorb the attention and advance the skills of physically challenged children, teaching them to make sense of their world and feel confident moving about in it.
Bubble Mania
Running, jumping, reaching, extending the arms and torso, pirouetting inside a cloud of bubbles - all these movements are working to coordinate gross motor muscle activity, from shoulder girdle flexibility to strengthening the muscles of the feet. While it may be hard work playing with bubbles, your chatty kid will sum this activity up as fun.
Materials
- Bubble solution and wand
Directions
- Pick a quiet day for bubble-blowing in the park or the yard.
- Teach an older child to sweep the wand to make bubbles. For a younger child, you should produce the bubbles.
- Let the child chase the bubbles, trying to catch them, stomping on any that land on the ground, and swishing their arms in a cloud of bubbles to disperse them.
Adaptations
- Give a child who is in a wheelchair a badminton racket or a ping pong paddle to bash the floating bubbles.
- Blow a gentle flood of bubbles around the face of a visually challenged child so he can feel the delicate burst of bubbles against his skin.
River Stones
In River Stones, children pretend the living room rug is a river, and they have to get to the other side. With a perilous pretend river, this activity forces children to weight-shift, balance, alternate feet and jump with two feet and plant their heels on the ground. These activities help kids strengthen their ankles, which helps with push-off and controlling gait. Increasing step length stretches hip flexors and quadriceps. The combination of high stakes and weight-shifting skills is thrilling and irresistible to a child.
Materials
- Colored foam tiles or abstract plastic or paper shapes (large enough for the child's foot to fit on)
- Large space
Directions
- Lay out a set of colored foam tiles or abstract plastic or paper shapes to make a "bridge."
- Set these stepping stones far apart and at unusual angles so crossing the imaginary river is a bit of a stretch.
- Tell the child he must keep one foot on one stepping stone. This rule forces kids to balance, or they'll fall into the "river."
- You can relax the rules for little ones but everyone has to start over if they step off the "stones" and into the "water."
- Up the ante for older, more coordinated children by requiring them to jump from "river rock" to "slippery boulder," landing on two feet each time.
Adaptations
- Use very brightly colored shapes for visually impaired children.
- Use larger shapes and put the 'stones' closer together as needed for children with severe gross motor impairments.
3. Obstacle Course I
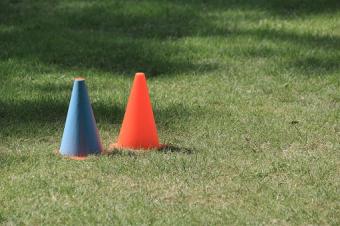
Thinking and moving at the same time can defeat some adults, but kids get the hang of it pretty quickly. There are multiple tasks in this obstacle course that help children improve their gross motor skills. A traffic cone obstacle course contributes to balance, change of direction, and gauging distances, and makes a great solo activity or competition. Walking backward targets hip extensors and glutes, promoting stability. Zipping through cones in a wheelchair works on upper body strength and flexibility.
Materials
- Two sets of two different colors of large cones
- Washi tape (if needed)
Directions
- Set up colored cones in a zigzag pattern in a driveway or on a flat stretch of the backyard.
- Use two different colors of cones. Washi tape on one set of cones will transform them if you can't find two solid colors.
- Arrange the second set in a more complex pattern for an older child, or for when your child conquers the easier course.
- Design a lazy half-moon detour in the middle of the course to test a younger child.
- Start children on the simple zigzag course.
- Next, have them tackle the complex course.
- Once they are familiar with both courses, let each child draw a colored card from a bag to see which course they must navigate.
- Raise the level of difficulty for a second round by walking through the first three cones backward.
- Compete against a timer or another player.
- Grab a token from the end of the course and return to the start with it, zigzagging back through the cones.
- Play music as the child tries to get to the end of the course before the music stops.
Adaptations
Adapt the course for wheelchairs by setting the cones farther apart so there is ample room to navigate the turns.
4. Obstacle Course II
Rainy days are for table tents and a fun house of invented indoor landscapes. An obstacle course in the living or dining room is one way to keep things interesting and burn off steam with whole-body exercise. Crawling, bouncing, scrambling, climbing, hopping and reaching are skills to get intrepid explorers stronger. Crawling helps with coordination and laterality, climbing places weight on the upper torso and strengthens back and abdominal muscles used for maintaining posture. The variety of movements promotes a better connection between the upper and lower body.
Materials
- Furniture
- Soft 'obstacles' such as towels, blankets, stuffed animals, etc.
- Cardboard boxes
- Interlocking puzzle hopscotch game
Directions
- Set up a beach-towel tunnel over the gap between two facing dining room chairs.
- Trail a big blanket or a sheet over a table and to the floor to make a dark cave.
- Toss loose sofa cushions in a heap to bounce on and scramble across.
- Position long pillows or rolled up towels along the route to climb over.
- Pile empty cardboard boxes into an arch to crawl through.
- End the trail with an interlocking hopscotch game to play.
Adaptations
Create a simpler, shorter, well-padded version of an indoor obstacle run for a visually impaired child. The challenges should be active confidence-builders that engage decision-making skills without presenting any opportunity for injury.
5. Flamingo Feet and Froggy Squats
This activity is a barefoot balancing act in which everyone gets to act silly and wobble like mad. Look at pictures of real frogs and flamingos before you get started, and note the positions of their legs and wings. Flamingos develop strong cores and great balance. Frogs lengthen and strengthen their hamstrings and spines and stretch hip flexors.
Materials
- Green felt or towel to make lily pad
- Bell (or anything that makes noise)
Directions
- Place a green "lily pad" - a piece of felt or construction paper or a green hand towel - on a carpet so it won't slide. Direct the little flamingo to stand on the lily pad with elbows bent and hands on waist or hips.
- Encourage the child to raise the left foot off the floor and transfer her weight to the right foot.
- Let her balance for a count of five or ten and then switch feet.
- As she masters the required balance, demonstrate how to place the lifted foot against the ankle of the standing leg, then the lower calf and eventually the top of the calf just below the knee.
- Don't expect all little flamingos to make it past ankle-height. Focus instead on decreasing wobbles.
- Turn into pond frogs after Flamingo Feet by squatting on the lily pad.
- Balance on the toes and balls of the feet.
- Keep knees wide and palms on the ground between the knees.
- Ring a bell to tell the frog to straighten her legs and bring her head down to her knees. This should be an easy, not a forced, move. Be sure her knees stay relaxed and her head is lowered, even if she can't fold in half like a master yogi.
- Click again to signal a return to frog squat.
- Make it mad fun by adding a loud "Ribbet!" as she squats or straightens to each ring.
- Repeat several times.
Adaptations
Substitute a gentle shoulder tap instead of the bell for a hearing impaired child. A child with balance or movement issues can simply raise and lower her head while squatting on the lily pad, keeping both hands flat on the ground.
6. Backyard Bowling

Tossing, rolling and aiming are solid skills to develop with some recycled trash and a "bowling" ball. Just a few recyclable bottles, some tape and a ball are all you need for a private backyard bowling alley that relocates to the rec room when it's cold or rainy outside. Kids won't know they are improving shoulder girdle flexibility when they are rolling, tossing and throwing a ball, and they won't be thinking about enhanced hand-eye coordination as they aim to knock down more bowling pins than you do.
Materials
- Plastic one-liter bottles or plastic half-gallon milk bottles
- Sand (if necessary)
- Ball
- Colored tape
Directions
- Set up the empty bottles in a triangle formation at a distance from the child. Gauge the distance by the child's capability - he needs a moderate challenge, not a daunting one.
- Add a small amount of sand or just a few river rocks or marbles to the bottles if they tend to fall over on the grass. You're aiming to help stabilize them, not weigh them down. They should topple when tapped by the ball.
- "Draw" a line on the ground with tape for the bowler to stand behind.
- Remind your child of the rule that not even a toe can go over the line.
- Take turns between two or more children or between you and the child, rolling three consecutive balls towards the "pins" to knock them down.
- Keep score, laugh a lot and use a ball the child can easily grasp. A child's rubber ball - bigger than a tennis ball - is best.
- Experiment to see which ball allows for the occasional strike for your bowling champion. The game should build aim and coordination, not frustration.
Adaptations
A child who uses a wheelchair can bowl with six, half-gallon plastic milk carton pins and a slightly larger rubber ball that can be rolled from a seated position.
7. Messy Midline Crossing Activity
A summer day, an outside wall, a bathing suit and a garden hose guarantee a big mess, an easy clean-up, great sensory play, all-important midline crossing practice and non-stop giggles. Midline crossing skills are important for left-right hemisphere brain communication and the development of a dominant hand and handwriting dexterity. The focus on squishy fun takes attention off the positioning and encourages automatic movement of the hand and arm across the center of the body to complete a task.
Materials
- Outside wall
- Colored chalk
- Shaving cream
Directions
- Draw a vertical line in colored chalk on the wall at chest height for the child. This mirrors the imaginary midline down the center of the child's body.
- Tape a stand-behind line on the ground directly in front of the vertical line.
- Squirt a can of shaving cream into a large plastic bowl set on a stool or bench nearby.
- Have the child take a big scoop of shaving cream in his right hand.
- Standing at the tape, facing the wall squarely, he smears the foam on the left side of the chalk line on the wall.
- Repeat the process using the left hand to scoop and smear on the right side of the wall. Each time the child applies foam to the wall, he is crossing the midline.
- Continue, alternating hands, until all the shaving cream is on the wall.
- Show him how to place one hand on top of the other and make big circles in the messy foam for more midline crossing.
- Finally, work together to create a horizontal infinity symbol or figure-8 in the foam, repeating the pattern several times and reversing direction.
- Let the child make a mess for a while.
- After the activity is completed, use a hose to clean both kid and wall.
Adaptations
A child with difficulty distinguishing left and right can just smear the foam on the wall and be guided to make big, two-handed circles and figure eights in it. Standing at the tape line and facing the wall guarantees the activity will involve midline crossing.
A child in a wheelchair can work pulled up to a table with a flat tray divided in half for the shaving cream. Guide them with right hand/left tray, left hand/right tray so their arms are crossing their bodies each time they apply the foam.
Gross Motor Skill Building Games
Gross motor skills ordinarily follow a predictable pattern of development - miss a milestone and subsequent skills are affected. Your challenged child will benefit from targeted therapy to strengthen weak muscles and train them to respond as part of whole-body movement. But daily games provide low-stress, high-bonding practice at becoming stronger, more fluid and more confident. Encourage your child to exult in being alive, whatever her handicap, with playful activities to help her master her world.


